
Enabling NuGet Support in Xamarin Studio
Previously we looked how to configure Xamarin Studio to feel a bit more familiar to those of us coming from Visual Studio. Now we're going to take a look at how to install the NuGet package manager Add-in for Xamarin Studio.
NuGet
Adding the NuGet Add-in isn't difficult, but there are a number of steps involved.
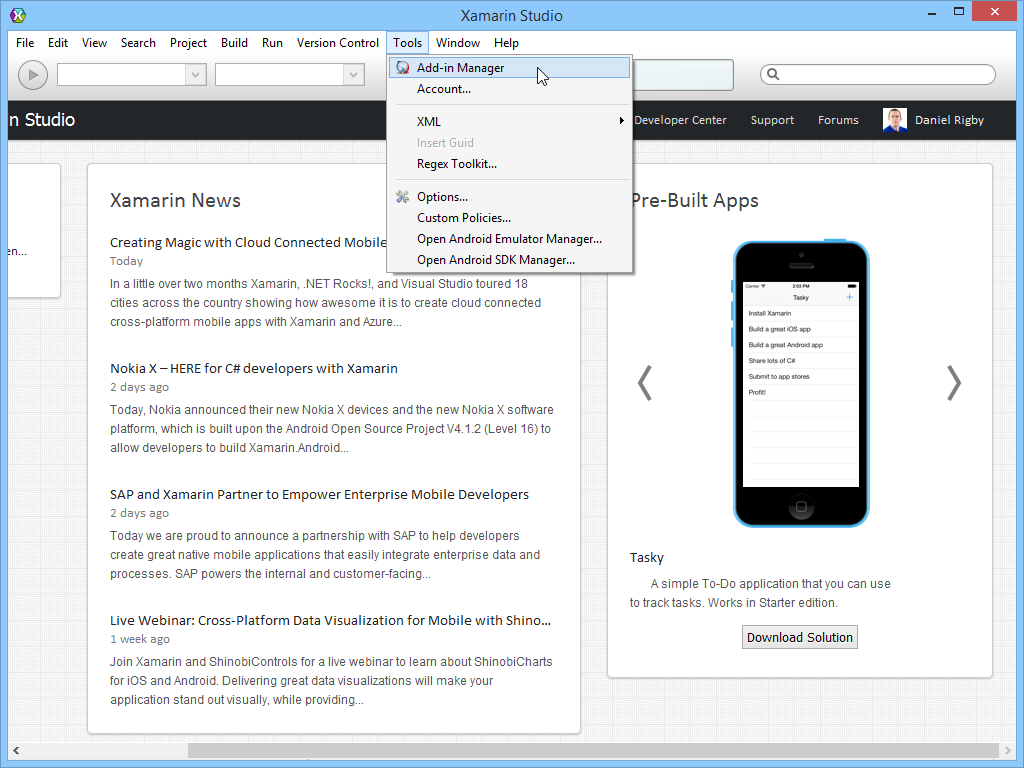
Open the Tools menu, then click on Add-in Manager. On OSX you can find this option under the Xamarin Studio menu.
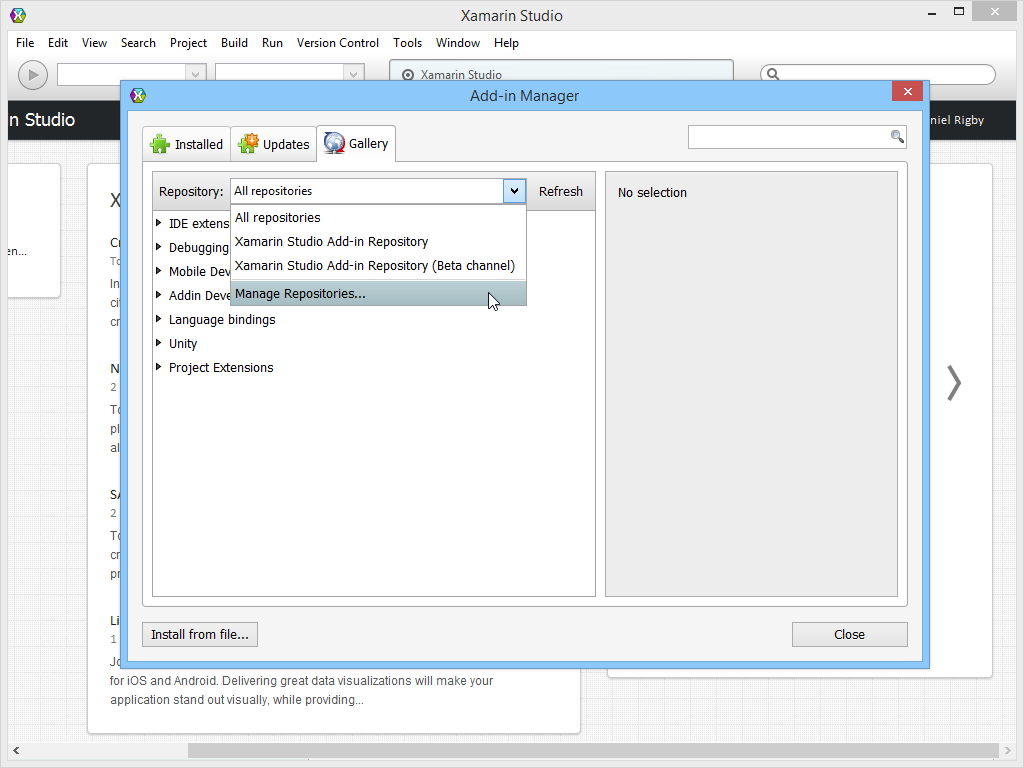
Select the Gallery tab, open the Repository drop down menu, sand and select Manage Repositories...
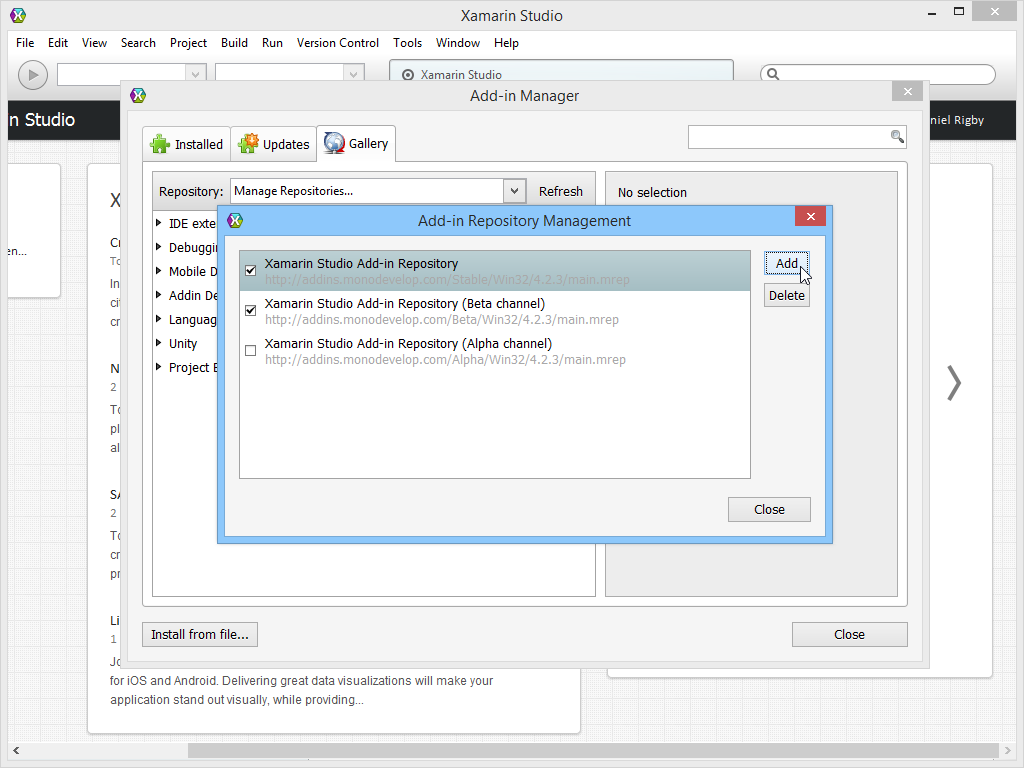
Click on the Add button in the Add-in Repository Management window.
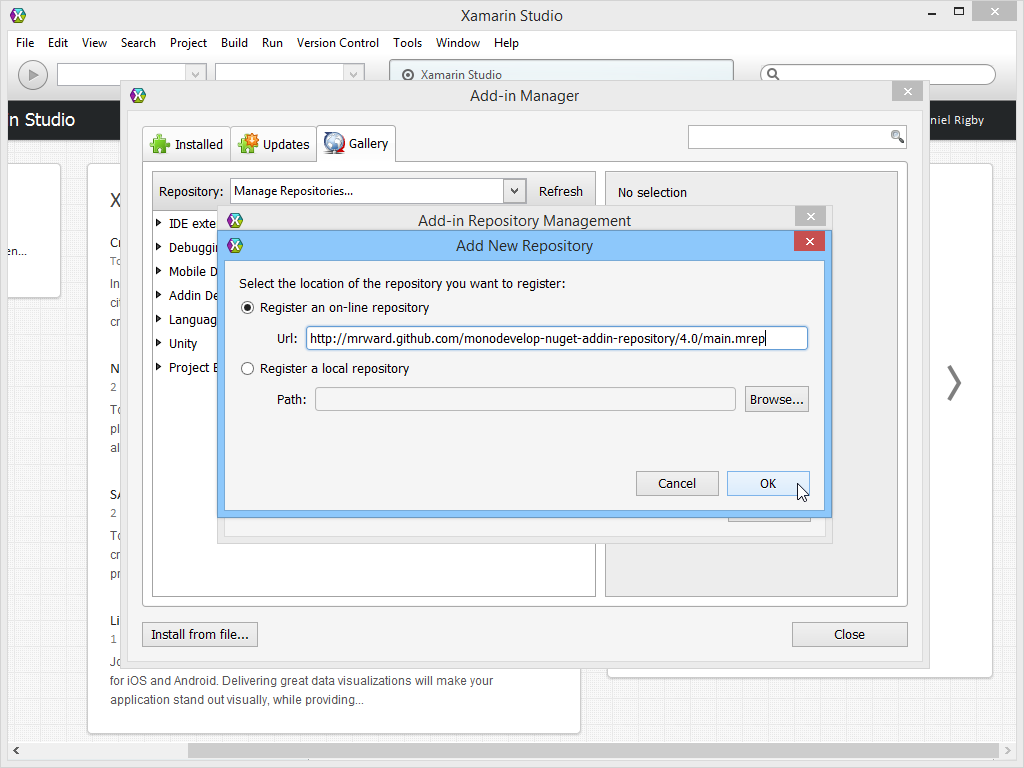
On the Add New Repository window, select Register an on-line repository, enter http://mrward.github.com/monodevelop-nuget-addin-repository/4.0/main.mrep for the url, and click OK.
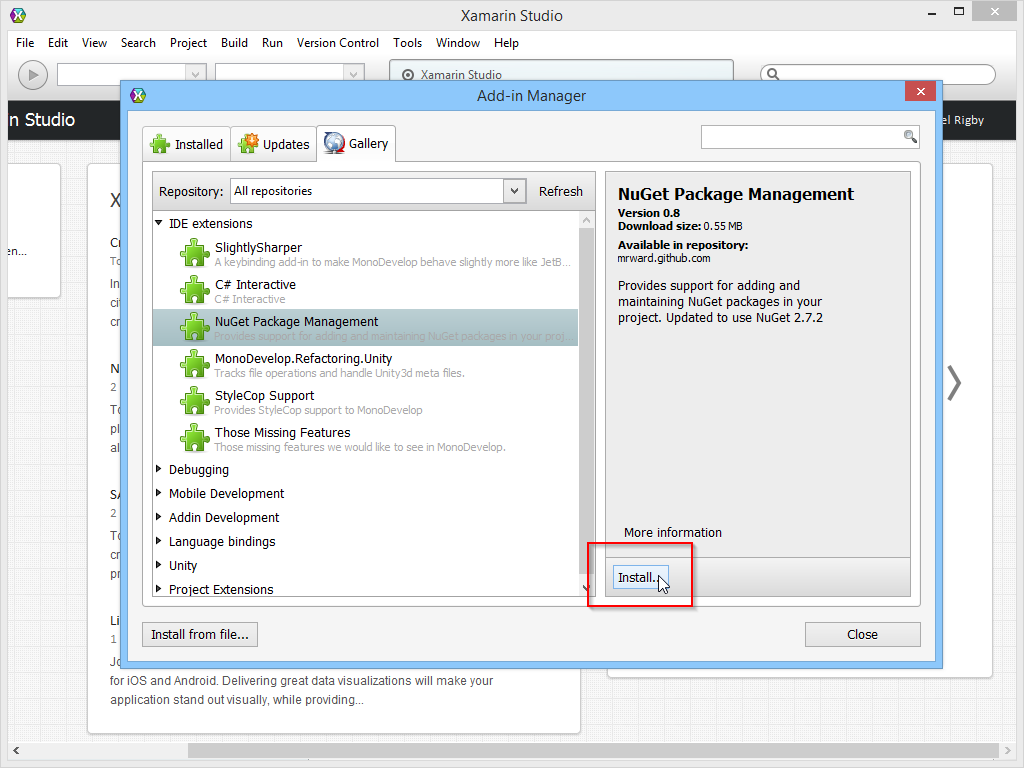
Back on the Add-in Repository Management window, we're going to open the IDE extensions node in the left panel, select NuGet Package Management, and click on the Install buttton located at the bottom of the right panel.
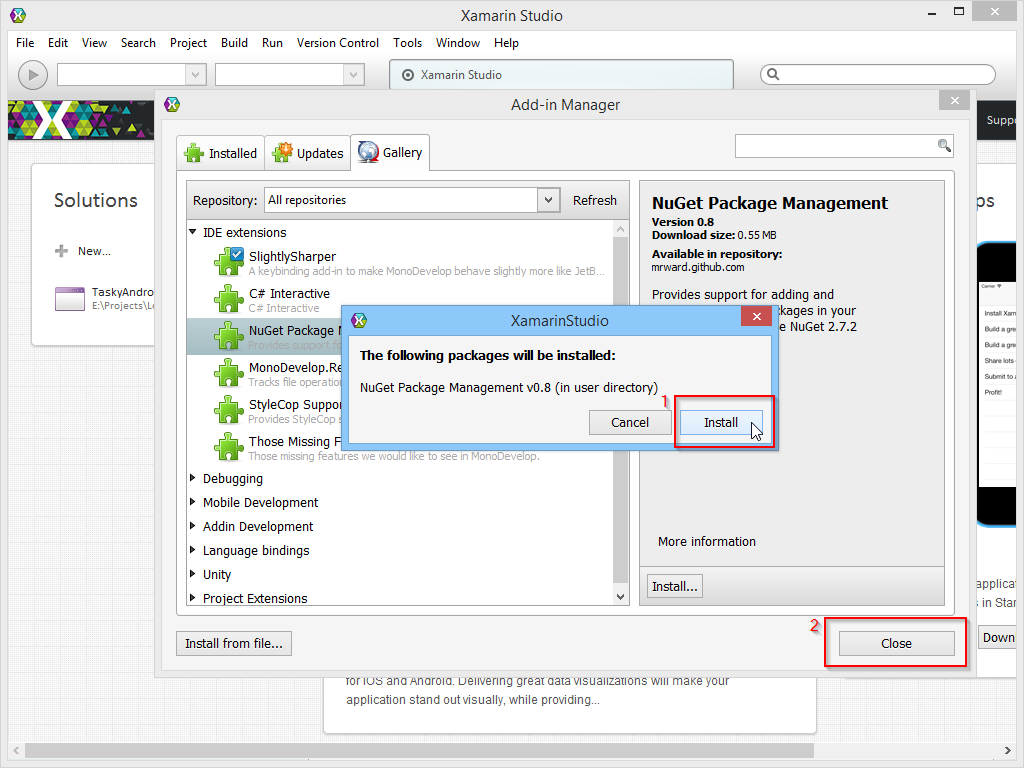
This is going to open a prompt asking us the confirm the installation of the Add-in. Click on Install in the dialog, then go ahead and click on the Close button on the Add-in Repository Management window.
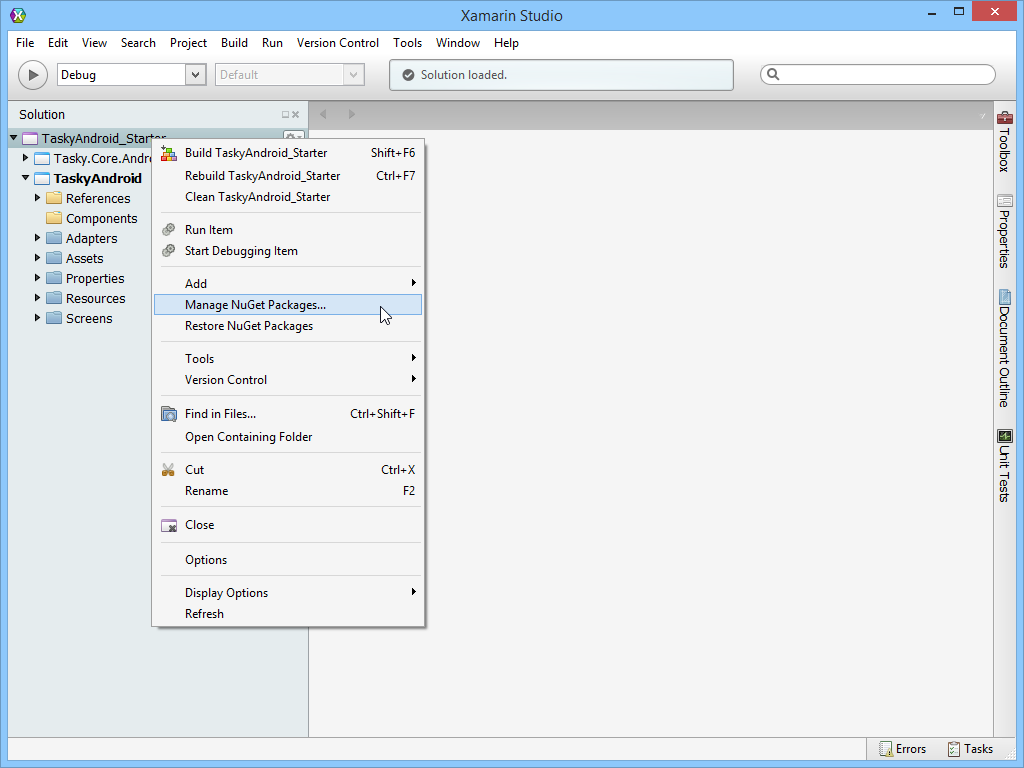
Bask in our freshly installed NuGet-y goodness. You'll find two new menu options when you right click on a Solution, Project, or Project References node in the Solution Pad (the different tool windows in Xamarin Studio are called Pads): Manage NuGet Packages... and Restore NuGet Packages.
A big thanks to Matt Ward for creating the MonoDevelop/Xamarin Studio NuGet Add-in. Head over to the MonoDevelop NuGet Add-in project site on GitHub to learn even more about using the Add-in.